
Business Requirements Document (BRD)
Date | Version Number | Author | Reviewed by | Approved by | Document change reference |
12/31/2024 | 1.0 | Shreshtha | Madhava Ramu | Initial draft for AMRIT Admin web portal enhancements:
| |
12/31/2024 | 1.0 | Shreshtha | Madhava Ramu | Initial draft for FLW App enhancements on following features:
| |
03/02/2025 | 1.1 | Shreshtha | Madhava Ramu | Initial draft for FLW App enhancements on following features:
| |
04/03/2025 | 1.2 | Shreshtha | Madhava Ramu | Initial draft for FLW App enhancements on following features:
| |
13/03/2025 | 1.3 | Shreshtha | Madhava Ramu | Initial draft for FLW App enhancements on following features:
|
Definitions, Acronyms, and Abbreviations
S. No | Term / Acronym / Abbreviation | Full form/ Definition |
1 | FLW | Frontline Health Workers; i.e. ASHA, ANM and AWW |
2 | ASHA | Accredited Social Health Activist |
1. Introduction
1.1 Document Purpose
The purpose of this document is to describe business requirements related to the enhancements planned for this phase of development in FLW App “SAKHI”.
1.2 About Piramal Swasthya
Piramal Swasthya Management and Research Institute (PSMRI), an initiative under the aegis of Piramal Foundation. Is one of the largest not-for-profit organizations in India. Piramal Swasthya is contributing with its experience and expertise of building innovative solutions that impact at scale.
Piramal Swasthya is focused on bridging the public healthcare gaps by supplementing and complementing the Government of India's vision to meet Universal Health Coverage. In the primary public healthcare space with a focus on Maternal, Child and Adolescent Health and Non-communicable Diseases. Piramal Swasthya has more than a decade-long experience in operating several healthcare innovations at scale, which are addressing the primary healthcare needs of the most underserved and marginalized populations across India. Piramal Swasthya is operational in 21 States in India through 35 innovative public healthcare delivery programs and has served more than 112 million beneficiaries so far.
One such innovation is AMRIT (Accessible Medical Records via Integrated Technologies) which is a digital health platform developed by Piramal Swasthya that stores electronic health records of beneficiaries for the use of public primary healthcare service delivery and decision-making. The platform enables the connection between beneficiaries, health facilities, and frontline workers in an integrated ecosystem through technology.
1.3 Services and features under AMRIT Platform
HWC Application: A comprehensive application with 12 Service packages.
MMU Application: Offline and Online Application to support operations in outreach programs.
HIHL Application: Helpline CRM to support services like 104, 1097, MCTS and ECD with inbound and outbound facility.
Telemedicine Solution: Video consulting facility.
Smart Phone Applications: Sakhi/ Utprerona Android Mobile App ASHAs.
Point of Care Device: AMRIT is integrated with PoCT devices like Fetosense and Healthcube etc.
ABDM compliant: and AMRIT is integrated with ABDM for ABHA with all three (M1, M2, M3) milestones.
1.4 Background
1.5 Background of ASHA Concept
The Government of India launched National Rural Health Mission (NRHM) in 2005 to address the health needs of rural population, especially the vulnerable sections of society. The Sub Centre (SC) is the most peripheral level of contact with the community under the public health infrastructure. This caters to a population norm of 5000, but is effectively serving much larger population at the SC level.
Thus, provision for new band of community based functionaries, named as Accredited Social Health Activist (ASHA) was made to fill this void. ASHA is the first port of call for any health related demands of the rural population, especially women and children, who find it difficult to access health services.
ASHA is volunteer health activists in the communities, who is creating awareness on health and its social determinants and mobilize the community towards local health planning and increased utilization and accountability of the existing public health services. She is a promoter of good health practices.
ASHA will be entitled for Performance Based Incentives fixed by the NRHM State HQ for prefixed activities only. The performance based incentives required to be given on monthly basis to ASHA.
The role, responsibilities, profile and compensation package for ASHA is given below.
1.6 Scope of Work
- In FLW Android Mobile App, design and development of new features and enhancements specified in this Business requirements document.
Including FLW App dependent backend tasks (related to new APIs, business logic, database). - Tasks related to AMRIT Admin web portal, related enhancements specified in this Business requirements document.
2. AMRIT Admin web portal enhancements
2.1 Bulk User accounts Registration
Purpose
This process helps admin to save time in creating multiple User accounts individually by entering details manually in the registration form.
Currently the admin portal supports creating single User account at a time. This new approach of bulk User accounts registration process simplifies creating multiple user accounts at a time, simply by entering details in an excel sheet and upload.
Admin Module: Bulk User accounts registration and validation notes
- Bulk User Creation Process:
Download Template: Admin must download a predefined Excel sheet template containing all necessary metadata fields including optional and mandatory fields marked with star (
 ).
).- Fill Template: Admin should fill the excel sheet template with the necessary Users' details including optional and mandatory fields. Mandatory fields must be completed with valid data.
- Upload Template: The filled excel sheet template is imported using upload function.
- Validation: System should validate each record as follows:
- Create User accounts for valid data.
- Reject creating accounts for invalid data
- Provide a log report with reason for each record, like invalid/missing data.
- Feedback:
- Show success message with count (e.g., "15 out of 20 users created successfully").
- Provide an error log file for failed records with reasons for failure
Mockup: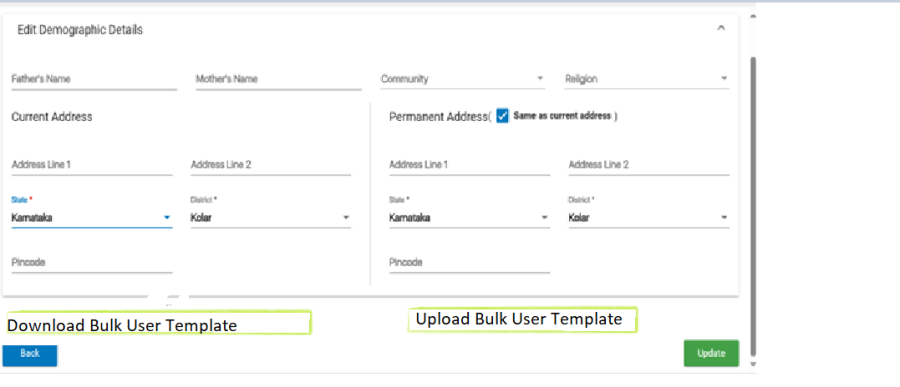
Refer to this Jira ticket: AMM-1220 - Getting issue details... STATUS
In addition to the current feature of creating single User account at a time, introducing this feature of creating multiple User accounts by uploading a excel sheet with the user details like mentioned in this below table.
This below table is only for the reference of metadata used for User account creation, values used in the dropdowns, mandatory or non-mandatory fields, and specific data validation for data sanity.
S No | Name of Data Field | Field Type | Value/ Options | Validation/ Logic/ Condition |
| Download Bulk User Template | Button |
| |
| Title | Dropdown | Existing Master Values |
|
| First Name | Text | Any |
|
| Middle Name | Text | Any |
|
5. | Last Name | Text | Any |
|
6. | Gender | Dropdown | Female, |
|
7. | Contact No. | Numeric |
| |
| Designation | Dropdown |
|
|
9. | Emergency Contact No. | Numeric |
| |
10. | Date of Birth | Date | Date Format |
|
| Age | Numeric | Any |
|
| Text |
| ||
| Marital Status | Dropdown | Divorced, Married, Not Applicable, Separated, Unmarried, Widow, Widower | |
| Aadhar No. | Numeric | 12-digit number |
|
| PAN Card No. | Alphanumeric | Any valid PAN format |
|
| Qualification | Dropdown | Graduate, Post Graduate & Above, Secondary, Senior Secondary, Under Graduate | |
17. | Father's Name | Text | Any |
|
| Mother's Name | Text | Any |
|
| Community | Dropdown | General, SC, ST, BC, OBC, OC, Not given |
|
| Religion | Dropdown | Hindu, Muslim, Christian, Sikh, Buddhism, Jainism, Other, Parsi, Not Disclosed |
|
| Current Address | Text | Any |
|
| Permanent Address | Text | Any |
|
| Date of Joining | Date | DD/MM/YYYY |
|
| Upload Template | Button | Upload completed template |
|
3. FLW App enhancements
3.1 About Sakhi App
Sakhi App is a digital job aid tool, specially designed for Accredited Social Health Activist (ASHA). ASHAs usually use multiple registers for Household enumeration, family member registration, and health data collection. This leads to challenges of manual errors, loss of data, and data accuracy. In this context, Piramal Swasthya Management and Research Institute has designed and developed a mobile application for ASHA workers to digitalize and reduce the manual work.
It is designed to reduce manual labor, enhance efficiency, and ensure timely and accurate data collection by ASHAs.
All the services that are carried by ASHA in the field are available in the Sakhi Mobile App, including services for RMNCH+A (Reproductive, Maternal, Newborn, Child, and Adolescent Health), this application enhances service delivery and monitoring for Household Enumeration, Antenatal care, Postnatal care, Immunization services, as well as Non-Communicable Diseases (NCDs) screening and Tuberculosis (TB) screening.
3.2 Sakhi App overview of Comprehensive Modules

3.3 Process flow diagram of Sakhi App

3.4 Implement Beneficiary Consent process
Purpose
Taking consent from beneficiary is very important to save their demographic details, clinical and health records in EHR.
Beneficiary consent is a process by which we take proper consent from beneficiary digitally, like
OTP-Based Consent: Real-time verification through OTP sent to the beneficiary's mobile number.
This process of taking consent from Beneficiary by verifying the OTP received on the Beneficiary's mobile number is applicable in entire platform service lines where Beneficiary registration takes place.
Beneficiary Consent using OTP approach
Now consent via OTP should be mandated for Head of the Family and Family Members registration. Once Household registration is completed, proceed with Head of the Family and Family Members registration with taking proper consent by verifying OTP sent on beneficiary's Mobile number via SMS.
After the "Date of Registration" field, provide a editable-text field with Pre-filled Mobile number of HOF for entering the mobile number to capture consent. Display a "Mobile Number Belongs To" dropdown with values, followed by a "Send OTP" button.
Refer to this Jira ticket: FLW-25 - Getting issue details... STATUS
Use cases:
- Household registration (amenities) record should sync to server, only once Head of the Family Member's consent is verified. Like order of record syncing process should follow: Household registration >> Head of the Family Member registration >> Family Member registration; only once consent is verified.
- Successfully, OTP verified records should sync to server and indicate with green color symbol on beneficiary card as "consent is taken"
- Beneficiary records that are not verified with OTP, should not sync to server, should save as draft and indicate with orange color symbol on beneficiary card to notify "consent is due"
- Existing Beneficiary records that are already synced to server, but OTP consent is not verified earlier, should indicate with yellow color symbol on beneficiary card to notify "record is synced but consent is due"
- Beneficiary records should be flag based on the status of consent
- In Beneficiary line listing, should have a filter to sort the records based on the status of consent
This feature should be implemented in the existing screens/ form of Head of the Family and Family Members registration.
Data fields mentioned in this below table are new fields, should be added to the existing screens/ form for taking Beneficiary consent.
For receiving the OTP on the Beneficiary's mobile number, verifying OTP, etc. An API and SMS gateway integration is required, for these details refer to this Jira ticket: AMM-778 - Getting issue details... STATUS
Name of Data Field | Field Type | Value/ Options | Validation/ Logic/ Condition |
Mobile Number (for taking consent using OTP) | Text Box |
| |
Whose Mobile Number | Dropdown Values |
|
|
Send OTP | Button |
| |
Resend OTP | Button |
| |
OTP Verification | Textbox | A) Online Mode
| |
3.5 ASHA Incentives
Purpose:
The ASHA Incentive module is designed to calculate the incentive amount based on the healthcare activities completed by ASHA workers. It enables ASHAs to generate a detailed incentive claim in PDF format, which can be submitted to the appropriate portal for disbursement. This ensures that ASHAs have a transparent and accurate record of their eligible incentives, helping them claim their earnings without missing any completed work.
ASHA Incentive Claim Process and Tracking
ASHAs are entitled for performance based incentives fixed by the NRHM State HQ for prefixed activities only. The performance based incentives required to be given on monthly basis to ASHA.
Incentive Claim Form should be calculated on monthly basis, that is claim Form should be generated for every month
At any point of time should be able to generate claim Form for selected month
Should the maintain the status of claimed activity and un claimed activity for every beneficiaries
Since some of the activities start and end up after 3 months, 6 months, 9 months and 2 Years, 5 years, so we need to track this activities when it is ended, based on the end date of activity that activity amount can be claimed in that month.
Automate the ASHA incentives claim form
In the FLW App, the primary objective is to generate incentives claim form for the activities completed by the ASHA in that particular month. This will help ASHA to reduce her manual work of filling her incentives claim form.
For calculating the incentives of several activities refer to this document BRD for FLW Mobile App, under section of system validation table under the 'validation section' mentioned as "Incentives Logic".
This entire incentives logic should be calculated in the backend business model and on hitting the "Create Incentives" button generate the incentives claim form in the PDF format.
Some of the sample activities related to incentives are below:
1.Incentives for ASHAs: Quarterly Visits under HBYC in Aspirational Districts
- This initiative is part of the Health and Wellness initiative under the Home-Based Young Childcare (HBYC) program.
ASHA will get an incentive of ₹250 per child if the following conditions are met (see BRD section 3.5.11- Font in Orange)
- The district selected must be an aspirational district.
- The ASHA worker must have submitted the HBYC forms for the 3, 6, 9, 12, and 15-month milestones.
2.Incentive to ASHA for follow up of SNCU discharge babies and for follow up of LBW babies
Add ASHA Incentive of ₹200 per case for following up on SNCU discharge babies. (see BRD section 3.5.10- Font in Orange)
New Fields to Capture Discharge Details
- Field: “Baby Discharged from SNCU” → Options: Yes/No
- If Yes is selected, add:
- Field: “Date of Discharge” (Mandatory)
3.Incentive for National Deworming Day for mobilising out of school children
Add ASHA Incentive for National Deworming Day for mobilizing out of school children Rs.100 per ASHA Per round 3.1.1.1.6 FMR Code(see below, under Disease Control Module :Sub Module: Deworming- Font in Orange)
Link to ASHA Incentives Claim Form : ASHA Incentives.xlsx
3.5.1 Village level Forms
Purpose:
The Village Level Forms module ensures accurate data entry for ASHA workers participating in village-level health and nutrition activities. This module includes forms for various activities such as VHND, VHNC, and PHC Review Meetings, validating required fields before submission to prevent incomplete entries and ensuring proper incentive allocation.
Summary:
This module provides ASHA workers with a structured way to record their participation in village-level meetings and activities. Each activity is represented as a clickable card. These cards serve as quick access points to respective forms.
Features on Home Screen:
Clickable Cards: VHND, VHNC, and PHC Review Meetings are clickable
Overdue Highlighting: If a form submission is overdue, the respective card will be highlighted for user attention.
Navigation to Forms: Clicking a card will navigate the user to the respective data entry form.
Validation Rules: Ensures mandatory fields are correctly filled before submission to maintain data integrity.
Name of Data Field | Field Type | Field Type | Validation/ Logic/ Condition |
VHND | Clickable Card | Navigates to VHND form on click. If overdue, display "Overdue" in red. | |
VHNC | Clickable Card | Navigates to VHNC form on click. If overdue, display "Overdue" in red. | |
PHC Review Meeting | Clickable Card | Navigates to PHC Review Meeting form on click. If overdue, display "Overdue" in red. | |
AHD Form | Clickable Card | Navigates to ADH form on click. If overdue, display "Overdue" in red. | |
National Deworming Day | Clickable Card | Navigates to National Deworming Day form on click. If overdue, display "Overdue" in red. |
3.5.1.1 VHND Form
Purpose:
To ensure accurate data entry for ASHA workers attending the Village Health and Nutrition Day (VHND)
Feature:
This feature enables ASHA workers to log their participation in VHND sessions. The system to ensure all mandatory fields are correctly filled before submission, preventing incomplete entries.
Incentive Logic: ASHA receives an incentive of Rs. 200 per session for successfully mobilizing beneficiaries and attending the Village Health and Nutrition Day (VHND).
Name of Data Field | Field Type | Field Type | Validation/ Logic/ Condition |
VHND Date | Date Picker |
| Mandatory, cannot be a future date |
Place | Text Box |
| Mandatory, Alphanumeric + Special Characters allowed, Allow maximum 100 Characters |
No. of Beneficiaries Attended | Text Box | Mandatory, Only Numeric Allowed, Allow maximum 4 digits ASHA will receive an incentive of Rs. 200 per VHND session only if the VHND Date, Place, and Number of Beneficiaries Attended are correctly filled. | |
Upload Image | File Upload |
| Allow only specified file formats allowed; Allow 2 images, file size must not exceed 5MB. JPEG, PNG (Max size: 5MB),( allow 2 images also) |
Submit | Button |
|
Incentive logic: Upon Submit, Add ASHA incentive of Rs. 200 per VHND session for successfully mobilizing beneficiaries and attending the Village Health and Nutrition Day (VHND) as per FMR code 3.1.1.6.1 |
3.5.1.2 VHNC Form
Purpose:
To ensure accurate data entry for ASHA workers convening and guiding the monthly Village Health, Sanitation, and Nutrition Committee (VHNC) meeting by validating required fields before allowing submission.
Description:
This feature allows ASHA workers to log their participation in VHNC meetings. The system ensures all mandatory fields are correctly filled before submission, preventing incomplete entries.
Data Field Details & Validation Logic:
Name of Data Field | Field Type | Field Type | Validation/ Logic/ Condition |
| VHNC Date | Date Picker | Mandatory, cannot be a future date | |
| Place | Text Box | Mandatory, Alphanumeric + Special Characters allowed, Allow maximum 100 Characters | |
| No. of Participants Attended | Text Box | Mandatory, only numeric allowed Allow maximum 4 digits | |
| Upload Image | File Upload | Allow only specified file formats allowed; Allow 2 images, file size must not exceed 5MB. JPEG, PNG (Max size: 5MB) | |
| Submit | Button |
Incentive logic: Upon Submit, Add ASHA incentive of Rs. 150 per meeting for Convening and guiding monthly Village Health Sanitation and Nutrition meeting. as per FMR code 3.1.1.6.1 |
3.5.1.3 PHC Review Meeting
Purpose:
To ensure ASHA workers accurately log their attendance at PHC review meetings by validating required fields before allowing submission.
Description:
This feature records ASHA workers’ participation in PHC review meetings. The system enforces validation rules to ensure completeness before submission, preventing incomplete entries.
Data Field Details & Validation Logic:
Name of Data Field | Field Type | Field Type | Validation/ Logic/ Condition |
| PHC Review Meeting Date | Date Picker | Mandatory, cannot be a future date | |
| Place | Text Box | Mandatory, Alphanumeric + Special Characters allowed max 100 characters | |
| No. of Participants Attended | Text Box | Mandatory, only numeric allowed, Allow maximum 4 digits | |
| Upload Image | File Upload | Allow 2 images, allow only JPEG, PNG (Max: 5MB) formats allowed, file size must not exceed 5MB | |
| Submit | Button |
Incentive logic: Upon Submit, Add ASHA incentive of Rs 150 Per PHC Review meeting as per FMR code 3.1.1.6.1 |
3.5.1.4 AHD Form
Purpose:
To record the date and place where the ASHA has mobilized adolescents and the community for the Adolescent Health Day (AHD).
Overview:
The AHD Mobilization feature enables ASHAs to record whether they have mobilized for an Adolescent Health Day. If mobilized, they can enter the place and date of the event, with an incentive of ₹200 provided.
Name of Data Field | Field Type | Field Type | Validation/ Logic/ Condition |
Mobilized for AHD | Radio Button | Option: Yes No | If yes, then enable “Place” and “Date” Fields Incentive Logic: If “Yes” then, Add ASHA incentive of Rs 200 for mobilizing adolescents and community for AHD per AHD /Per ASHA [per FMR 3.1.1.3.2] |
AHD Place | Dropdown | Options:
| Mandatory, enable if mobilized for AHD is "Yes" |
AHD Date | Calendar | Mandatory, enable if mobilized for AHD is "Yes" | |
| Upload Image | File Upload | Allow 2 images, only JPEG, PNG (Max: 5MB) formats allowed, file size must not exceed 5MB | |
| Submit | Button |
Incentive logic: Upon Submit, Add ASHA incentive of Rs 200 per AHD as per FMR code 3.1.1.3.2 |
3.5.1.5 National Deworming Day
This Sub-module supports deworming of children at the community level, ensuring the coverage of out-of-school children through ASHA-led mobilization. It tracks deworming status, location of administration (school/home visit), age group eligibility, ensuring proper monitoring of the deworming process.
Add ASHA Incentive for National Deworming Day for mobilizing out of school children Rs.100 per ASHA Per round 3.1.1.1.6 FMR Code
Name of Data Field | Field Type | Value/ Options | Validation/ Logic/ Condition |
Deworming Round Done? | Radio Button | Options:
| Mandatory field. If "Yes" is selected show next fields. If selected "Yes" then Add ASHA Incentive of Rs 100 Per round for National Deworming Day (FMR Code- 3.1.1.1.6) |
Date of Deworming | Calendar Picker |
| Mandatory if "Deworming Done?" = Yes |
Upload Image | File Upload |
| Allow 2 images, only JPEG, PNG (Max: 5MB) formats allowed, file size must not exceed 5MB |
Location of Deworming | Radio Button | Options:
| Mandatory if "Deworming Done?" = Yes. |
Age Group | Numeric |
| Mandatory |
3.6 Find ABHA
To find ABHA Number of beneficiary by search using Mobile Number
Search may result multiple ABHA Numbers linked to the Mobile Number
Select the Name and proceed to get other details
Proceed to save the ABHA Number of selected beneficiary.
There should be one Radio Button with below options:
1. Search ABHA
2. Create ABHA
Steps to Find ABHA number using Mobile number
- API: 'v3/profile/account/abha/search'
- This above New V3 API would provide the list of associated ABHA IDs mapped with a particular mobile number.
- API Input: enterer Mobile number in API body which will return list of mapped ABHA numbers.
- API Output: Masked ABHA numbers with personal info i.e. Name and Gender.
- You need to select the ABHA ID by providing the respective index from the list of ABHAs.
- Then there is option to fetch the profile details based on the OTP sent to registered mobile number of the ABHA holder.
- You will get user token once the OTP is verified successfully, and the token can be used to performed further operations.
Refer to this Jira ticker: FLW-153 - Getting issue details... STATUS
3.7 Implement API for Micro Birth Plan Data Integration
This below table is only for the reference of metadata used for creating API, since this screen/ form is currently available in the Application.
Refer to these Jira tickets:
FLW-179 - Getting issue details... STATUS
AMM-1230 - Getting issue details... STATUS
Name of Data Field | Field Type | Field Type | Validation/ Logic/ Condition |
Name of the PW | Text Box | Auto-populate | |
Age | Text Box | Auto-populate | |
Contact No. 1 Contact No. 2 | Text Box |
| |
SC/HWC/TG Hosp | Text Box |
| |
Block | Text Box |
| |
Husband’s Name | Auto-Populate | ||
Nearest SC/HWC | Text Box |
| |
Nearest 24*7 PHC | Text Box |
| |
Nearest FRU | Text Box |
| |
Nearest USG centre | Text Box |
| |
Blood Group | Spinner | Choose:
| Auto Fill if available OR Select form Spinner |
Blood donors identified | Text Box |
|
|
Birth Companion | Text Box |
|
|
Person who will take care of Children, if any when the PW is admitted for delivery | Text Box |
|
|
Name and Contact number of VHSND/Community member for support during emergency | Text Box |
|
|
Mode of transportation in case of labor Pain | Text Box |
|
|
3.8 ASHA's Profile
Purpose
To create a comprehensive ASHA Worker Profile management system, enabling the collection and management of personal and family data. This will ensure that all necessary information related to the ASHA workers, their family members, and village details is accurately recorded and synced with the server.
Hamburger Menu Update
- A new Button called ASHA Profile will be added in the hamburger menu.
- When the user clicks on the ASHA Profile menu item, they will be redirected to the ASHA Profile Screen.
ASHA Profile
The ASHA Profile Screen will display the following details about the ASHA worker:
- Name of the ASHA worker
- Village the ASHA worker belongs to
- Employee ID (assigned to the ASHA worker)
- Contact Information (mobile number, alternate mobile number)
- Family Details (e.g., husband's name, number of children, spouse information)
- Bank Details (e.g. Bank account, IFSC)
- Name & Contact Information (e.g. CHO, ANM, AWW)
Edit Profile Option:
A Edit Profile will be available on the profile screen. Clicking this will redirect the user to the Edit Profile Screen.
Edit ASHA Profile
The Edit ASHA Profile Screen will allow the ASHA worker to modify their details. The fields available for editing will include:
- Name
- Village
- Employee ID
- Husband's Name
- Number of Children
- Spouse Information
- Bank Details
- Name & Contact Information
Save Changes:
A Save button will be available to save any changes made to the profile. Once the save action is triggered, the updated information should be stored and displayed on the View Profile screen.- Allow add, edit and view of the ASHA’s photo in the placeholder.
Refer to this Jira ticket: FLW-175 - Getting issue details... STATUS
Mockup

This below table is for the reference of data fields used in this screen/ form and metadata used for creating API.
Name of Data Field | Field Type | Field Type | Validation/ Logic/ Condition |
ASHA Name | Text Box | Auto-Populate | |
Village | Text Box | Auto-Populate | |
Login Username | Text Box | Auto-Populate | |
ASHA Emp ID | Text Box |
| |
DOB | Text Box | Auto-Populate | |
Age | Text Box | Auto-calculated from Date of Birth. | |
Mobile Number | Text Box | Auto-Populate | |
Alternate Mobile Number | Text Box |
| |
Father/Spouse Name | Radio Button | Choose between Father or Spouse (Radio buttons for selecting either). | |
Date of joining | Text Box | Auto-Populate | |
Bank Account | Text Box | Accepts only numeric values (integer). Length should be between 9-18 digits depending on bank. No special characters allowed. | |
IFSC | Text Box | Non-mandatory Alphanumeric characters (typically 11 characters); Format: 4 letters followed by 7 digits (e.g., | |
Population Covered under ASHA | Text Box | Accepts only numeric values. Should be a positive integer. Max Character Limit is 4 digit | |
ASHA Supervisor Name | Text Box | Accepts alphabetic characters and spaces only | |
ASHA Supervisor Contact No. | Text Box | Accept numeric (integer) value only; Accepts 10 digits only; Should start with 6, 7, 8, or 9; Cannot start with 0; Should not accept all same digits | |
CHO Name | Text Box | Accepts alphabetic characters and spaces only. | |
Mobile No. of CHO | Text Box | Accept numeric (integer) value only; Accepts 10 digits only; Should start with 6, 7, 8, or 9; Cannot start with 0; Should not accept all same digits. | |
Name of AWW | Text Box | Accepts alphabetic characters and spaces only. | |
Mobile No. AWW | Text Box | Accept numeric (integer) value only; Accepts 10 digits only; Should start with 6, 7, 8, or 9; Cannot start with 0; Should not accept all same digits | |
Name of ANM1 | Text Box | Accepts alphabetic characters and spaces only. | |
Mobile number of ANM1 | Text Box | Accept numeric (integer) value only; Accepts 10 digits only; Should start with 6, 7, 8, or 9; Cannot start with 0; Should not accept all same digits. | |
Name of ANM2 | Text Box | Accepts alphabetic characters and spaces only. | |
Mobile number of ANM2 | Text Box | Accept numeric (integer) value only; Accepts 10 digits only; Should start with 6, 7, 8, or 9; Cannot start with 0; Should not accept all same digits. | |
ABHA number | Text Box | Accept a 14-digit alphanumeric value only. | |
ASHA Household Registration | Text Box | Alphanumeric characters. Should follow a specific format if defined for the household registration number. | |
ASHA Family Member | Text Box | Accepts alphabetic characters, numeric, and spaces. Should list the names and relationships of family members | |
Save | Button | Save any changes made to the profile |
Note:
3.9 Dashboard KPIs for ABHA and RCH Tracking
Purpose:
As part of enhancing the existing dashboard, introducing new Key Performance Indicator (KPIs) by displaying actionable insights for ABHA Generation and RCH ID Count, allowing users to track progress effectively. Introduce filters in the All Beneficiaries and Pregnant Women (PW) sections for better sorting of records with ABHA and RCH IDs. Additionally, enable export functionality for beneficiaries with ABHA to Excel, ensuring streamlined management and accessibility of data.
Enhance the dashboard and beneficiary management features by:
- Displaying ABHA Generated Count and RCH ID Count as icons on the dashboard, with line listings for detailed insights.
- Adding filters in the All Beneficiaries and Pregnant Women (PW) sections to sort beneficiaries with ABHA and RCH IDs.
- Providing the ability to export ABHA beneficiary lists to Excel for easy sharing and analysis.
Refer to this Jira ticket: FLW-176 - Getting issue details... STATUS
Name of Data Field | Field Type | Field Type | Validation/ Logic/ Condition |
ABHA Generation Icon | Label |
|
|
RCH ID Icon | Label |
|
|
Pregnant Women Line Listing | Filter |
|
|
Beneficiary Line Listing Filter | Filter |
|
|
Export ABHA | Button |
|
|
3.10 ASHA's Non-Follow-Up cases
Purpose:
Highlight the beneficiaries (Pregnant Women, Eligible Couples) who have not been visited in the last three months. This helps ASHA workers quickly identify and prioritize these beneficiaries for follow-up, ensuring timely care and interventions.
Action Plan for the Flagging Feature:
Dashboard Changes
- Add an indicator labeled "No Visit in Last 3 Months" under relevant sections (ANC, PNC, EC).
- Clicking the indicator will navigate to a line listing of flagged beneficiaries.
Filter Implementation
- Use last visit date and compare it with the current date.
- Include records only from the current year to avoid old entries.
Logic for Flagging
- If the gap between the last visit date and the current date is greater than three months, flag the beneficiary.
- Ensure the system considers only valid and current records to avoid redundant flags.
Refer to this Jira ticket: FLW-177 - Getting issue details... STATUS
Name of Data Field | Field Type | Field Type | Validation/ Logic/ Condition |
Flag (for No Visit in Last 3 Months) | Flag (Boolean) |
|
|
No Visit (3Months) | Icon |
|
|
3.11 Identify and track missed period cases
Purpose
To introduce a system that records the Last Menstrual Period (LMP) date during the registration of eligible couples and ensures proper tracking of women who have missed their periods. This system will help in early identification and intervention for possible pregnancies.
Action Plan
LMP Date Field:
A new date field will be added to the Eligible Couple Registration and Eligible Tracking screens to record the LMP date at the time of registration. This will allow better monitoring of the menstrual cycle for eligible couples.Dashboard Indicator:
- A count of women who have missed their periods will be displayed on the Dashboard.
- A separate line listing will provide detailed information about these women for further action.
- Missed periods will be determined based on the LMP date and the system's predefined cycle tracking logic.
Refer to this Jira ticket: FLW-178 - Getting issue details... STATUS
Name of Data Field | Field Type | Value/ Options | Validation/ Logic/ Condition |
LMP Date | Calendar Picker |
| Eligible Couple Registration and Eligible Tracking Section, |
Missed Period Flag | Flag |
| Triggered if the difference between the current date and the LMP date exceeds 35 days. |
Missed Period (Dashboard Indicator) | Icon |
| Included it under "Dashboard" Section Displays the count of women with missed periods based on the Missed Period Flag from both "Eligible Couple Registration" and "Eligible Couple Tracking" Section Provides a list of flagged women with their Names, LMP dates. |
3.12 Disease Control Module
Introduction
The National Center for Vector Borne Diseases Control (NCVBDC) administers an umbrella programme, namely, National Vector Borne Diseases Control Programme (NVBDCP) for prevention and control of vector borne diseases namely Malaria, Japanese Encephalitis, Dengue, Chikungunya, Kala-azar and Lymphatic Filariasis.
Purpose:
The Disease Control Module is designed to facilitate the identification, tracking, and management of infectious diseases in the village community. This module enhances early detection through a structured approach. It ensures real-time case monitoring, to reduce the disease burden in communities.
Note: Add NCD module as another Sub module
- A new Disease Control Module should be available on the Home Screen.
- The module should contain submodules for different diseases.
- Each submodule should include a household line listing.
- Under the household line listing, there should be a family member line listing.
- This structure should be consistent across all modules.
This module includes following sub-modules for specific diseases
- Malaria
- Kala Azar
- AES/JE (Acute Encephalitis Syndrome/ Japanese Encephalitis)
- Filaria
- Leprosy
Refer to this Jira ticket: FLW-48 - Getting issue details... STATUS
3.12.1 Malaria Module
This sub-module enables the identification and management of malaria cases at the village community level. It includes household search, auto-populated individual details, malaria case management with symptoms tracking, referral and treatment workflow, and lab test confirmation
- When selecting a household, a toggle button should be available at the top of the family member listing.
- When the toggle is ON, a table should appear showing:
- Date
- Rounds
- Submit button
- Below the table, a history section should display previous IRS rounds in a separate table, including:
- Serial number
- Date
- Number of rounds
- IRS rounds should be tracked yearly (Frequency 4 times in a year).
Incentive Logic:
- ASHA receives ₹15 for each malaria slide collected under the NVBDCP per FMR Code 3.1.1.4.1
- ASHA receives ₹75 per confirmed case for ensuring the treatment of malaria-positive patients. per FMR Code 3.1.1.4.1
Note :
On the card, display "Suspected" in "Yellow" color.
The form remains editable in the "Suspected" statuses. For all other statuses, it is view-only.
- This should be a Transactional record with Visit Number and Date in the Calendar Year.
If a case is Confirmed, the form becomes read-only (no edits allowed).
After screening, confirmed cases will be maintained in a separate line listing under the module titled "Follow-up for Confirmed Cases," where editing options will be available.
Name of Data Field | Field Type | Value/ Options | Validation/ Logic/ Condition |
House Hold No. | Numeric |
| Search by household number. |
Head of Family Member Name | Text Box |
|
|
Mobile No. | Numeric |
|
|
Name | Text Box |
| Auto-populated from "Enumeration FM" First Name, Middle Name, Last Name. |
Father's Name / Husband Name | Text Box |
| If Gender = Female and Marital Status = Married, auto-populate from Spouse Name. If Gender = Male, auto-populate from Father’s Name. |
Age | Text Box |
| Auto-populated from "Enumeration FM" |
Gender | Text Box |
| Auto-populated from "Enumeration FM" |
Mobile No. | Text Box |
| Auto-populated from "Enumeration FM" |
ABHA ID | Text Box |
| Auto-populated from "Enumeration FM" |
Malaria Screening Date | Calendar Picker |
| Allow belated dates till last 3 months from todays date and Not greater than Today's Date |
| Beneficiary Status | Radio Button | Select:
| If 'Status' = "Dead" then disable all below fields and Enable only these fields Date of Death, Place of Death and Reason for Death Select default value "Not Applicable" |
| Date of Death | Calendar | If 'Status' = "Dead" then enable Mandatory Allow belated dates till last 3 months from todays date and Not greater than Today's Date | |
| Place of Death | Drop Down | Select:
| If 'Status' = "Dead" then enable Mandatory |
Other Place of Death | Text Box |
| Applicable If 'Status' = "Dead" Enable only if "Other" is selected above |
| Reason for Death | Drop Down | Select:
| If 'Status' = "Dead" then enable Mandatory |
Other Reason for Death | Text Box |
| Applicable If 'Status' = "Dead" Enable only if "Other" is selected above |
Symptoms | Multi-Select Choices |
| Fever more than two weeks, Flu-like illness, Shaking chills, Headache, Muscle aches, Tiredness, Nausea, Vomiting, Diarrhea (Yes/No) Default is "No" |
Case Status | Drop Down | Option: 1.Suspected, 2. Confirmed, 3. Not Confirmed, 4. Treatment Given. | If any of the above symptoms are "Yes" then select "Suspected" First Entry: Only "Suspected" can be selected. Test id not Done but symptoms are present then Suspected Any Test is Positive, Confirmed If Test are Negative Not confirmed Color Indications for Malaria Cases:
|
| Rapid Diagnostic Test (RDT) | Radio button | Option
| If you have performed an RDT, If positive, put a plus (+) in red; If negative, put a dash (-).in green If you have not performed an RDT, put a cross X in Yellow |
| Date of RDT | Calendar | Mandatory if above field RDT is selected Allow belated dates till last 3 months from todays date and Not greater than Today's Date | |
| Malaria Slide Test Pf | Radio button | Option
| Default not performed If you have performed an Malaria Slide Test, If positive, put a plus (+) in red; If negative, put a dash (-).in green If you have not performed, put a cross X in Yellow |
| Malaria Slide Test Pv | Radio button | Option
| Default not performed If you have performed an Malaria Slide Test, If positive, put a plus (+) in red; If negative, put a dash (-).in green If you have not performed, put a cross X in Yellow |
| Date of Slide Test | Calendar | Mandatory if above field RDT is selected Allow belated dates till last 3 months from todays date and Not greater than Today's Date | |
| Slide No | Auto Calculate: | ||
Case Status | Drop Down | Option: 1.Suspected, 2. Confirmed, 3. Not Confirmed, 4. Treatment Given. | If any of the above symptoms are "Yes" then select "Suspected" First Entry: Only "Suspected" can be selected. Test id not Done but symptoms are present then Suspected Any Test is Positive ,Confirmed If Test are Negative , any No test Performed is "Not confirmed" |
Referred To | Drop Down |
| Options: Primary Health Centre, Community Health Centre, District Hospital, Medical College and Hospital, Referral Hospital, Other Private Hospital, Other, None. |
Other Referred Facility | Text Box |
| Required only if "Referred To" = "Other". |
Remarks | Text Box |
| Optional field for additional notes. |
Date of Visit by Supervisor | Calendar |
| Allow belated dates till last 3 months from todays date and Not greater than Today's Date |
Incentive Logic |
|
| For Lab Test: Malaria = X+1 for every unique confirmed case in the current month, for particular house hold "X" is a Variable |
- A separate line listing titled "Follow-up for Confirmed Cases". Upon clicking this, users will be able to update treatment details, including treatment start date, progress tracking, completion date, and referrals.
- Auto-populate below Patient Details on the Card:
Patient Name – Full name of the patient.
Age and Gender– Display as "Age and Gender
Ben ID – Display Beneficiary ID
Date of Diagnosis – The date when the malaria case was confirmed.
Name of Data Field | Field Type | Value/ Options | Validation/ Logic/ Condition |
| Date of Starting Treatment | Date Picker | Cannot be a future date; must be on or after the test date. | |
| Treatment Given | Radio Button | Options: 1.Pf 2.Pv | Mandatory field. |
| Pf - Day-wise Tracking | Checkbox | Options: Day 1, Day 2, Day 3 | Available only if "Pf" is selected under Treatment Given. At least one day must be selected. |
| Pv - Day-wise Tracking | Checkbox | Options: Day 1, Day 2, Day 3, Day 4 | Available only if "Pv" is selected under Treatment Given. At least one day must be selected. |
| Date of Completion of Treatment | Date Picker | DD/MM/YYYY | Cannot be before the "Date of Starting Treatment". |
| Date of Referral | Date Picker | DD/MM/YYYY | Optional. If entered, must be after the "Date of Starting Treatment". |
Follow-up for Confirmed Cases will be a separate section under the system.
Users must select whether the treatment is for Pf (Plasmodium falciparum) or Pv (Plasmodium vivax).
Based on the selection:
Pf will show tracking options for Day 1, Day 2, Day 3.
Pv will show tracking options for Day 1, Day 2, Day 3, Day 4.
Date of Completion of Treatment must be recorded and validated to ensure it follows the treatment start date.
Date of Referral can be entered if applicable, but it must be after treatment initiation.
3.12.2 Kala Azar Module
The Kala Azar sub-module focuses on early detection, treatment and tracking of Kala Azar cases at the village community level. It ensures accurate case status updates, referral options, treatment initiation, and structured follow-up at different points of the treatment cycle.
Name of Data Field | Field Type | Value/ Options | Validation/ Logic/ Condition |
House Hold No. | Numeric |
| Search by household number. |
Head of Family Member Name | Text Box |
|
|
Mobile No. | Numeric |
|
|
| Data Field | Text Box | ||
| Name | Text Box | Auto-populated from "Enumeration FM" (First, Middle, Last Name) | |
| Father's/Husband's Name | Text Box | "If Gender = Female and Marital Status = Married, auto-populate from 'Spouse Name'. If Gender = Male, auto-populate from 'Father Name'" | |
| Age | Numeric | Auto-populated from "Enumeration FM" | |
| Gender | Text Box | Auto-populated from "Enumeration FM" | |
| Type of House | Text Box | Auto-populated from "Enumeration HH" | |
| Caste | Text Box | Auto-populated from "Enumeration HH" | |
| Mobile No. | Numeric | Auto-populated from "Enumeration FM" | |
| ABHA ID | Numeric | Auto-populated from "Enumeration FM" | |
| Visit Date | Calendar |
| Allow belated dates till last 3 months from todays date and Not greater than Today's Date |
| Beneficiary Status | Spinner | Select:
| If "Status" not equal to "Dead" in previous "Follow Up point" If 'Status' = "Dead" then disable all below fields and Enable only these fields Date of Death, Place of Death and Reason for Death Select default value "Not Applicable" |
| Date of Death | Calendar | If 'Status' = "Dead" then enable Mandatory Allow belated dates till last 3 months from todays date and Not greater than Today's Date | |
| Place of Death | Drop Down | Select:
| If 'Status' = "Dead" then enable Mandatory |
Other Place of Death | Text Box |
| Applicable If 'Status' = "Dead" Enable only if "Other" is selected above |
| Reason for Death | Drop Down | Select:
| If 'Status' = "Dead" then enable Mandatory |
Other Reason for Death | Text Box |
| Applicable If 'Status' = "Dead" Enable only if "Other" is selected above |
| Kala Azar Case Status | Spinner | Select:
| First time user will select "Suspected" option only and from second time the user will select either "Confirmed" or "Not Confirmed". The system will display the "Treatment Started" only if the previous status was "Confirmed". Define variable Kala Azar Case with default value = 0 and for every unique confirmed case in the current month Kala Azar Case = Kala Azar Case +1 |
Kala Azar Rapid Diagnostic Test (RDT) | Radio button | Option
| If you have performed an RDT If positive, put a plus (+) in red If negative, put a dash (-) in green If you have not performed an RDT, put a cross X in Yellow |
| Date of Test | Calendar | Mandatory if above field RDT is selected Allow belated dates till last 3 months from todays date and Not greater than Today's Date | |
| Follow Up Point | Spinner | Single Select 1, 2, 3, 4, 5, 6 | If "Kala Azar Case" = "Treatment Started" If "Status" not equal to "Dead" in previous "Follow Up point" Disabled the option (1,2,3,4,5,6) once selected |
| Referred To | Drop Down | Options Primary Health Centre, Community Health Centre, District Hospital, Other Private Hospital, Medical College and Hospital, Referral Hospital, Other | |
Other Referred Facility | Text Box |
| Required only if "Referred To" = "Other" |
3.12.3 AES/JE Module
This sub-module facilitates the tracking and management of AES/JE cases through household searches, individual case tracking, referral management, and status updates to ensure effective case monitoring.
Name of Data Field | Field Type | Value/ Options | Validation/ Logic/ Condition |
House Hold No. | Numeric |
| Search by household number. |
Head of Family Member Name | Text Box |
|
|
Mobile No. | Numeric |
|
|
| Is there a "सुअर बाराह" near the house ? | Radio Button | Value/Options | Yes, No Single Select Radio Button |
| Name | Text Box | Auto-populated from "Enumeration FM" (First, Middle, Last Name) | |
| Father's/Husband's Name | Text Box | "If Gender = Female and Marital Status = Married, auto-populate from 'Spouse Name'. If Gender = Male, auto-populate from 'Father Name'" | |
| Age | Numeric | Auto-populated from "Enumeration FM" | |
| Gender | Text Box | Auto-populated from "Enumeration FM" | |
| Type of House | Text Box | Auto-populated from "Enumeration HH" | |
| Caste | Text Box | Auto-populated from "Enumeration HH" | |
| Mobile No. | Numeric | Auto-populated from "Enumeration FM" | |
| ABHA ID | Numeric | - | Auto-populated from "Enumeration FM" |
| Visit Date | Calendar |
| Allow belated dates till last 3 months from todays date and Not greater than Today's Date |
| Beneficiary Status | Spinner | Select:
| If "Status" not equal to "Dead" in previous "Follow Up point" If 'Status' = "Dead" then disable all below fields and Enable only these fields Date of Death, Place of Death and Reason for Death Select default value "Not Applicable" |
| Date of Death | Calendar | If 'Status' = "Dead" then enable Mandatory Allow belated dates till last 3 months from todays date and Not greater than Today's Date | |
| Place of Death | Drop Down | Select:
| If 'Status' = "Dead" then enable Mandatory |
Other Place of Death | Text Box |
| Applicable If 'Status' = "Dead" Enable only if "Other" is selected above |
| Reason for Death | Drop Down | Select:
| If 'Status' = "Dead" then enable Mandatory |
Other Reason for Death | Text Box |
| Applicable If 'Status' = "Dead" Enable only if "Other" is selected above |
| AES / JE Case Status | Spinner | Single Select: Suspected, Confirmed, Not Confirmed, Treatment Started | First time user will select "Suspected" option only and from second time the user will select either "Confirmed" or "Not Confirmed". The system will display the "Treatment Started" only if the previous status was "Confirmed". Define variable AES / JE Case with default value = 0 and for every unique confirmed case in the current month AES / JE Case = AES / JE Case +1 |
| Follow Up Point | Spinner | Single Select 1, 2, 3, 4, 5, 6 | If "AES / JE" = "Treatment Started" If "Status" not equal to "Dead" in previous "Follow Up point" Disabled the option (1,2,3,4,5,6) once selected |
| Referred To | Drop Down | Options Primary Health Centre, Community Health Centre, District Hospital, Other Private Hospital, Medical College and Hospital, Referral Hospital, Other | |
Other Referred Facility | Text Box |
| Required only if "Referred To" = "Other" |
3.12.4 Filaria Module
The Filaria sub-module tracks filariasis cases by capturing household and individual details, home visit dates, affected body parts, medication distribution under the Mass Drug Administration (MDA) program, and any reported side effects of treatment
Name of Data Field | Field Type | Value/ Options | Validation/ Logic/ Condition |
House Hold No. | Numeric |
| Search by household number. On select search the system will display the field given under "House Hold Detail" with list of family member with suffering from Filariasis option next to the name of each family member and allow user to select applicable option. |
Head of Family Member Name | Text Box |
| Auto-populate from sheet "Enumeration HH" and cell "First Name", "Middle Name", "Last Name". |
Mobile No. | Numeric |
| Auto-populate from sheet "Enumeration HH" and cell "Mobile Number" |
Home Visit Date | Numeric |
| Display Today's Date and should be non-editable |
Name | Text Box |
| Auto-populate from sheet "Enumeration FM" and cell "First Name", "Middle Name", "Last Name". |
Husband's / Father's / Mother's Name | Text Box |
| If "Gender" = "Female" and "Martial Status" = "Married" then auto-populate from sheet "Enumeration FM" and cell "Spouse Name" |
Age | Text Box |
| Auto-populate from sheet "Enumeration FM" |
| Gender | Text Box | - | Auto-populated from "Enumeration FM" |
| ABHA ID | Numeric | - | Auto-populated from "Enumeration FM" |
| Suffering from Filariasis | Radio Button | Options Yes No | If "suffering from Filariasis" = "Yes" Default selection should be "No" |
| Which part of Body | Drop Down | Options Right Hand, Left Hand, Right Leg, Left Leg, Right Side Breast, Left Side Breast Hydrocele, Other | Display If "suffering from Filariasis" = "Yes" If "Gender" = "Male" hide option "Right Side Breast" and "Left Side Breast" If "Gender" = "Female" hide option "Hydrocele" |
| Home Visit Date (MDA Program) | Calendar |
| Display Today's Date and should be non-editable On select search the system will display the field given under "House Hold Detail" with list of family member with DEC and Albendazole Dose Status option next to the name of each family member and allow user to select applicable option. |
| DEC and Albendazole Dose Status | Drop Down | Options T, P, Y S, H, A, R, L, O | Display "P" If beneficiary is pregnant women or Display "Y" If "Age" less than 2 year and should be non-editable Define variable Filariasis with default value = 0 and for every unique "T" in the current month Filariasis = Filariasis +1 |
| Other | Text Box |
| If "DEC and Albendazole Dose Status" = "O" |
| Medicine Side Effect | Radio Button | Options F (Fever), H (Headache), B (Body Pain), V (Vomiting), N (Najala), O (Other), None | If "DEC and Albendazole Dose Status" = "P" OR "Y" OR "S" F (Fever), H (Headache), B (Body Pain), V (Vomiting), N (Najala), O (Other), None Default selection "None" |
| Other | Text Box |
| If "Medicine Side Effect" = "O (Other)" |
3.12.5 Leprosy Module
This sub-module supports leprosy screening, detection, and follow-up at the village community level, screening status, referral information, leprosy type classification, and ongoing treatment follow-up to ensure continuous patient care.
Name of Data Field | Field Type | Value/ Options | Validation/ Logic/ Condition |
House Hold No | Numeric |
| Autopopulte from sheet "Enumeration HH" and cell "House Number " On select search the system will display the field given under "House Hold Detail" with list of family member with Leprosy Status option next to the name of each family member and allow user to select applicable option. |
Head of Family Member Name | Text Box |
| Autopopulte from sheet "Enumeration HH" and cell "First Name","Middle Name", "Last Name". |
Mobile No. | Numeric |
| Autopopulte from sheet "Enumeration HH" and cell "Mobile Number" |
Total no. of members in the house | Text Box |
| Autopopulte from sheet "Enumeration HH" and cell "Total number of members in the house" |
Total No. of member screened | Text Box |
| Count and display the "Leprosy Status" = "Screened" for selected House Hold |
Total No. of confirmed cases | Text Box |
| Count and display the "Leprosy Status" = "Confirmed" for selected House Hold |
Patient Name | Text Box |
| Autopopulte from sheet "Enumeration FM" and cell "First Name","Middle Name", "Last Name". |
Father's Name / Husband Name | Text Box |
| If "Gender" = "Female" and "Martial Status" = "Married" then autopopulte from sheet "Enumeration FM" and cell "Spouse Name" |
Age | Text Box |
| Autopopulte from sheet "Enumeration FM" and cell "Age" |
Gender | Text Box |
| Autopopulte from sheet "Enumeration FM" and cell "Gender" |
Mobile No. | Text Box |
| Autopopulte from sheet "Enumeration FM" from the data field "Mobile Number" |
ABHA ID | Text Box |
| Autopopulte from sheet "Enumeration FM" and cell "ABHA No." |
Date of Home visit | Text Box |
| Display Today's Date and should be non-editable |
Leprosy status | Text Box |
| Screened, Denied, Not Screened, Suspected, Confirmed, Not Confirmed Default selected value should be "Not Screened" and Allow user to select "Suspected" or "Screened" or "Denied" only if the previous status is "Not Screened". Define variable "Leprosy" with default value = 0 and for every unique confirmed case in the current month Leprosy = Leprosy +1 (For Treatment) |
Referred To | Text Box |
| If "Leprosy Home visit status" = "Suspected" Primary Health Centre, Community Health Centre, District Hospital, Medical College and hospital, Referal Hospital, Other Private Hospital, Other |
Other | Text Box |
| If "Referred To" = "Other" |
Leprosy status Date | Calendar |
| Autopopulate current date, |
Type of Leprocy | Drop down | Options: MB PB PB, | If "Leprosy Home visit status" = "Confirmed" PB, MB Prepare a To-Do list. If "Type of Leprosy"="PB" then display the name of beneficiary in the To-Do list for follow up by ASHA till 6 months and in case of MB till 12 months. |
Follow up date | Calendar | OP | Developer Instruction: Allow user to enter the "Follow Up" multiple times and only when the "Leprosy status" is "Confirmed" |
Status | Drop-Down | Options: Recovering, Cured, Dead, Recurrence of Symptoms, Regularly taking medicine, Not regularly taking medicine, Treatment completed , Other | If "status" = "Not regularly taking medicine" display "Advice the patient to take medicine regularly for recovery" Define variable "PB" and "MB" with default value = 0 and for every cured case in the current month |
Remark | Text Box |
|
3.13 File Upload Feature
Implement File Upload Feature for MCP Card and Birth Certificate
This feature allows users to upload files in two key scenarios—MCP Card uploads during ANC visits and Birth Certificate uploads during child registration.
- MCP Card Uploads (ANC Module):
- Allows ASHA workers to upload the Mother and Child Protection (MCP) Card during any ANC visit.
- The system ensures that only the latest uploaded version is retained, replacing older versions.
- Users are provided with an upload button, and an indicator icon or text confirms successful uploads.
- Uploaded MCP cards can be viewed via a dedicated view button, and acceptable file types include JPG, PNG, and PDF.
- Positioning: The "Upload MCP Card" button must be positioned below the ANC Period field (refer to mockup for better understanding.)
- Birth Certificate Uploads (Child Registration Module):
- Enables uploading of the child's birth certificate during registration or in later edits.
- Both front and back sides of the certificate can be uploaded, and only the latest version is retained.
- The system includes an upload button and a view button for accessing the most recent certificate.
- Accepted file formats are JPG, PNG, and PDF, with a file size limit of 5 MB.
- Positioning: The "Upload Birth Certificate" button must be positioned below the Date of Birth field (refer to mockup for better understanding.)
- File Overwrite Logic:
- Both MCP Card and Birth Certificate uploads follow a single-file overwrite policy, ensuring only the most recent upload is displayed.
- This prevents clutter and avoids managing multiple files for the same document.
Refer to this Jira ticket: FLW-174 - Getting issue details... STATUS
3.13.1 Upload MCP Card
MOCKUP for MCP CARD UPLOAD

MCP Card Related Fields (Under ANC Module)
Name of Data Field | Field Type | Field Type | Validation/ Logic/ Condition |
MCP card Upload | Button |
|
|
File Overwrite Logic | System |
|
|
View Uploads | Button |
|
|
Allowed File Types/File Size |
|
|
3.13.1 Upload Birth Certificate
Mockup for Birth Certificate upload (Under Child Registration Module)

Birth Certificate Related Fields (Under Child Registration Module)
Name of Data Field | Field Type | Field Type | Validation/ Logic/ Condition |
Birth Certificate Upload | Button |
| |
File Overwrite Logic | System |
| |
View Uploads | Button |
| |
Allowed File Types/File Size | System |
|
3.14 Help Module with User Guide and Video Tutorials
The Help Module assists ASHA workers by providing comprehensive guidance on application functionalities through a user-friendly interface.
Help Module
The Help Module should be accessible via the hamburger menu
3.14.1 Video Tutorials
- A sub section for accessing video tutorials should be available under Help Module.
- Videos must play offline to ensure accessibility without internet connectivity.
3.14.2 User Guide
- A sub section for accessing the user manual in the form of PDF format should be available under the Help Module.
- The PDF manual will be pre-uploaded and available for offline use.
- Refer to this Jira ticket: FLW-39 - Getting issue details... STATUS
Name of Data Field | Field Type | Field Type | Validation/ Logic/ Condition |
User Guide | Image Button |
| |
Video Tutorial Icon | Image Button |
|
Mockup

3.15 ABHA Number creation using Biometrics
Purpose
Alternatively ABHA number can be created using the Fingerprint and Face authentication methods, these both methods are used to securely verify an individual’s identity for creating an ABHA number. These authentication methods helps and streamlines the ABHA number creation process by offering a simple, fast, and secure way to verify an individual's identity without OTP process.
3.15.1 Create ABHA using Fingerprint authentication method
To create ABHA using Fingerprint authentication method, optical fingerprint scanner device is required and device should be Aadhaar registered device (RD Device).
In this method, using fingerprint scanner device capture fingerprint of the beneficiary and processes for Aadhaar authentication.
This RD Service returns an encrypted PID block containing signed biometrics.
The PID can be then passed through the API mentioned below.
This API creates an ABHA account using fingerprint:
V3 URL: {{base_url}}/v3/enrollment/enrol/byAadhaar
Steps to Create ABHA number:
- First connect the fingerprint scanner device to mobile device
- On the beneficiary card, click on 'Create ABHA' and navigate to the below mockup screen
- In select mode dropdown, select "Fingerprint"
- Enter Aadhaar number with Aadhaar consent and capture fingerprint on the scanner device
- then processes for authentication as per the API provided
- then finally on successful authentication and after ABHA is created, print number on the beneficiary card
Mockup screen

3.15.2 Create ABHA using Face authentication method
To create ABHA using Face authentication method, a third-party app named as 'Aadhaar RD service' should be installed on the mobile device and Aadhaar RD service App with WADH key.
In this method, using Aadhaar RD service App capture face of the beneficiary and processes for Aadhaar authentication.
This RD Service returns an encrypted PID block containing signed biometrics.
The PID can be then passed through the API mentioned below.
This API creates an ABHA account using FaceAuth:
V3 URL: {{base_url}}/v3/enrollment/enrol/byAadhaar
Steps to Create ABHA number:
- First mobile device should be installed with 'Aadhaar RD service' App and configure FLW App and allow permission to call Aadhaar RD service App
- On the beneficiary card, click on 'Create ABHA' and navigate to the below mockup screen
- In select mode dropdown, select "FaceAuth"
- then redirected to the Aadhaar RD service App and capture face; If this application is not installed in device, then user should be redirected to google play store to download the RD service App
- Enter Aadhaar number with Aadhaar consent
- then processes for authentication as per the API provided
- then finally on successful authentication and after ABHA is created, print number on the beneficiary card
Mockup screen

3.16 ASHA Supervisor Module
Purpose
The purpose of this module is to provide a dashboard for ASHA Supervisors, CHOs, MOs, and MOICs, enabling them to monitor key performance indicators (KPIs) and take timely actions. The module ensures efficient monitoring at ASHA-wise, Village-wise, and Sub-Center-wise levels.
Scope
ASHA Supervisor Module is on the basis of 'Role based User access'. That is after first time user login based on the User role, i.e. as follows:
1. Role = "ASHA" then show all ASHA comprehensive modules.
i.e. Call APIs and download data related to ASHA App.
2. Role = "ASHA Supervisor" or "CHO" or "MO" or "MOIC" then show ASHA Supervisor module as below.
i.e. Call APIs and download data related to ASHA Supervisor module.
This should function online and offline.
Functionality
- Supervisors mapped to multiple subcenters will see aggregate data for all assigned subcenters.
- Read-only access is provided for Key performance data (KPIs).
- Data updates dynamically based on the selected filters (Subcenter, Village, ASHA Worker).
- Clicking on a KPI Card will display a list of Beneficiary names under that category.
Home Screen
The home screen includes four dropdowns (Month/Year, Subcenter, Village, ASHA Worker) that filter the displayed dashboard data based on the selected criteria.
Name of Data Field | Field Type | Field Type | Validation/ Logic/ Condition |
| Month/Year | Drop-down | Current Month/Year | Allows selection of past 2 years and cannot be a future date |
| Subcenter | Drop-down | Select 1 | Shows list of assigned subcenters |
| Village | Drop-down | All | Shows list of villages under the selected subcenter |
| ASHA Worker | Drop-down | All | Shows list of ASHA workers under the selected village/subcenter |
KPI Cards on Home Screen
KPI cards on the home screen display key health indicators, dynamically updating based on selected filters for effective monitoring. On Clicking the KPI Card, Show line listing of beneficiary with respect to the count, Show the same cards as shown in the respective modules
Name of Data Field | Field Type | Field Type | Validation/ Logic/ Condition |
| Households | Count | Sum of all registered households under the selected filter as of the selected date | |
| Beneficiaries | Numeric | Sum of all registered beneficiaries under the selected filter as of the selected date | |
| Eligible Couples | Numeric | Sum of all eligible couples identified under the selected filter as of the selected date | |
| Pregnant Women | Numeric | Sum of all pregnant women registered under the selected filter as of the selected date | |
| ANC Visits | Numeric | Count of all ANC visits recorded under the selected filter as of the selected date | |
| HRP Woman | Numeric | Count of pregnant women flagged as HRP under the selected filter as of the selected date | |
| Deliveries | Numeric | Count of total institutional & home deliveries under the selected filter as of the selected date | |
| Routine Immunization | Numeric | Count of all children immunized under the selected filter as of the selected date | |
| NCD Screened | Numeric | Total count of beneficiaries screened for NCDs under Screened and NCD Priority List for selected filter as of the selected date | |
| NCD Priority | |||
| TB Cases | Numeric | Total count of TB cases identified under the selected filter as of the selected date |
Mockup:

3.17 Adolescent Health
Purpose
Adolescence is the phase of life between childhood and adulthood, from ages 10 to 19.
ASHA workers play a crucial role in promoting adolescent health by facilitating access to health services, generating awareness, and ensuring accurate data collection. This initiative focuses on improving adolescent boys and girls health. Specially for girls health outcomes by providing services such as Iron and Folic Acid (IFA) supplementation, menstrual hygiene awareness, and timely referrals to health facilities.
To streamline data collection, a new "Health Form" button will be added to the Adolescent line listing for female beneficiaries only. Upon clicking this button, the Health Form will open, allowing ASHA workers to record health service details efficiently. This form will ensure compliance with program guidelines, validate key data fields, and automate incentive calculations based on sanitary napkin distribution, allowing ASHA workers to record monthly health service details efficiently
Facilitating Health Services:
- Distribute Iron and Folic Acid (IFA) tablets and provide information to adolescents on anemia prevention on monthly basis
- Promote menstrual hygiene by distributing sanitary napkins and creating awareness on monthly basis
- Enable this form every Month
Name of Data Field | Field Type | Field Type | Validation/ Logic/ Condition |
Name | Text | Auto-populate, from Beneficiary Details | |
Age | Text | Auto-Populate, from Beneficiary Details | |
Visit Date | Calendar Picker | Auto-Populate Today's date | |
Health Status | Dropdown | Option: Healthy Anemic Malnourished | Mandatory |
IFA Tablet Distribution | Radio Button | Option: Yes No | Mandatory |
Quantity of IFA Tablets | Number | Mandatory if IFA Tablet Distribution is "Yes" | |
Menstrual Hygiene Awareness given | Radio Button | Option: Yes No | Optional |
Sanitary Napkin Distributed | Radio button | Option: Yes No | If yes, then enable “No. of Packets Distributed”, “Place” and “Date” Fields |
No of Packets Distributed | Number picker (e.g [+3-]) | Option: (1-20) | Enable if Sanitary Napkin Distributed is "Yes" Incentive Logic: Add ASHA incentive of ₹ 1 for every packet of sanitary napkins distributed Incentive Formula: Incentive Amount = Number of Packets Distributed × ₹ 1. |
Place | Radio Button | Option:
| Enable if Sanitary Napkin Distributed is "Yes" |
Referred to Health Facility | Text | Name of Facility | Mandatory if Health Status is "Anemic" or "Malnourished" |
Counseling Provided | Radio Button | Option: Yes, No | Mandatory |
Counseling Type | Dropdown | Option: Individual, Group | Optional |
Follow-up Date | Calendar picker | Optional | |
Referral Status | Dropdown | Option: Pending, Completed | Optional |
3.18 General OPD Module
Purpose:
To streamline the identification and management of beneficiaries due for OPD services by integrating the General OPD module with the AMRIT-HWC system, enhancing efficiency and ensuring timely service delivery under the ASHA's sub-center.
Overview
This feature enables ASHAs to access a line listing of beneficiaries due for various OPD services. It facilitates efficient tracking, scheduling, and follow-ups while ensuring interoperability with the AMRIT-HWC system for real-time data synchronization.
System Overview:
The ASHA app allows ASHA workers to register a Beneficiary with a unique Beneficiary ID. When the same Beneficiary visits the HWC, they are either referred to another center or asked to follow up. This Beneficiary should then be shown in the General OPD line listing, with key details such as visit date, referral information, next visit details, Status with latest record on top.
The General OPD module will be a read-only line listing, with no clickable actions, the focus is purely on displaying the data in a structured format for reference purposes.
In line listing Beneficiary card data elements:
Name of Data Field | Field Type | Field Type | Validation/ Logic/ Condition |
Beneficiary Name | Text | Auto-populate, from Beneficiary Details | |
Age | Text | Auto-populate, from Beneficiary Details | |
Gender | Text | Auto-populate, from Beneficiary Details | |
Registration Date | Text | Auto-populate, from Beneficiary Details | |
Mobile number | Text | Auto-populate, from Beneficiary Details | |
Beneficiary ID | Text | Auto-populate, from Beneficiary Details | |
HWC Visit Date | Text | Auto-Populate from "Visit Date" in HWC Facility app | |
Referred to | Text | If referred, the name of the Facility where the Beneficiary is referred. | |
Follow-Up Date | Text | Auto-Populate from "Follow up date " in HWC Facility app | |
Call Button | Button | Enabled only if the Contact Number is available. Allows ASHAs to directly initiate phone calls to beneficiaries by redirecting from the app to the phone's dialer |
3.19 Voice Call and SMS Integration
Purpose:
To enable ASHAs to communicate effectively with beneficiaries through native phone calls, ensuring beneficiaries receive timely reminders and information dissemination related to healthcare services. This integration will enhance engagement and service delivery under various health modules.
Overview:
This feature introduces two key functionalities within the ASHA application:
1. Native phone voice call:
Allows ASHAs to directly initiate phone calls to beneficiaries by redirecting from the app to the phone's dialer.
2. Automated SMS Notifications:
Sends automated SMS messages to beneficiaries for various due services and reminders. These notifications will be triggered by the system and should include the following:
- Sending Namaste messages for due services like Immunization and ANC visits
- Sending welcome messages post-registration.
These functionalities will be integrated into all beneficiary line listings under each module, ensuring streamlined communication.
Scope:
- Addition of 'Call' button on the beneficiary card across all modules.
- Modules covered include:
- Immunization
- ANC
Data Fields Table:
Name of Data Field | Field Type | Field Type | Validation/ Logic/ Condition |
Call Button | Button | Enabled only if the Contact Number is available. Allows ASHAs to directly initiate phone calls to beneficiaries by redirecting from the app to the phone's dialer | |
ANC Reminder Notification | Text | Triggered for ANC due services one day before | Namaste [Beneficiary Name], I am [ASHA Name] reminding you of your upcoming ANC check-up |
Routine Immunization Reminder Notification | Text | Triggered for routine immunization services due one day before | Namaste [Beneficiary Name], I am [ASHA Name] reminding you of your child's immunization |
3.20 Push Notifications
Purpose:
This document defines the requirements for implementing a push notification service in the ASHA Worker App, ensuring ASHA workers receive timely alerts on upcoming service dues via mobile notifications for improved service delivery.
Overview:
This section details push notifications for key health services managed by ASHA workers, including:
- Antenatal Care (ANC)
- Pregnant Women Immunization
- Routine Immunization
Name of Data Field | Field Type | Field Type | Validation/ Logic/ Condition |
ANC Notification | String | ANC1, ANC2, ANC3, ANC4, PMSMA | Message: "Reminder: Scheduled ANC check-up (ANC1/ANC2/ANC3/ANC4/PMSMA) is due tomorrow. On clicking the notification, the user should be redirected to respective line listing section in the Work Plan. Trigger: One day before of the scheduled ANC date |
PW Immunization Notification | String | TT1/TT2
| Message: "Reminder: Pregnant woman's immunization (TT1 and TT2) is due tomorrow. On clicking the notification, the user should be redirected to respective line listing section in the Work Plan. Trigger: One day before the immunization is due |
Routine Immunization Notification | String |
| Message: "Reminder: Child's immunization is due tomorrow. On clicking the notification, the user should be redirected to respective line listing section in the Work Plan. Trigger: On day before the child's immunization is scheduled. |
Notification Logic:
All notifications should be sent via Google Firebase Push Notification service, with actionable links redirecting ASHA workers to the respective line listing section in the ASHA Work Plan.
Notifications should trigger based on due dates or specific events as outlined in the table above.
Notifications should not be clickable but should serve as reminders.
Users should be notified as per the logic defined for each service.
4 Comments
Dr Mithun James
Unknown User (shreshtha.bhandari@piramalswasthya.org) & Madhava Ramu N
Let's format this a little better. The information hierarchy is a little off.
It's not clear the headings, sub-headings and what is a parent / child.
Let's also add link to the Jira user story for each feature.
Shashank Kharkwal
Madhava Ramu N Unknown User (shreshtha.bhandari@piramalswasthya.org) Added few of the comment, please review and update once.
Madhava Ramu N
Shashank Kharkwal some comments related to field validation in the "Bulk User Registration" feature, we have not introduced any new validation in this feature, all the validation are present in the current User registration in the Admin side, same are used here to validate the User creation and generate a log report for failed records.
This Table is given for the reference of metadata (field used) for User registration and here all these details are filled in the excel sheet and uploaded, system should process and thro the error log report with reason for failed records.
Shashank Kharkwal
Madhava Ramu N as this will be an enhancement so we can update/change the validations. It will be a value addition for the platform.